Note
Go to the end to download the full example code.
Light Actors#
Positional lights in PyVista have customizable beam shapes, see the Beam Shape example. Spotlights are special in the sense that they are unidirectional lights with a finite position, so they can be visualized using a cone.
This is exactly the purpose of a vtk.vtkLightActor, the
functionality of which can be enabled for spotlights:
from __future__ import annotations

import numpy as np

import pyvista as pv
from pyvista import examples

cow = examples.download_cow()
cow.rotate_x(90, inplace=True)
plotter = pv.Plotter(lighting='none', window_size=(1000, 1000))
plotter.add_mesh(cow, color='white')
floor = pv.Plane(center=(*cow.center[:2], cow.bounds[-2]), i_size=30, j_size=25)
plotter.add_mesh(floor, color='green')

UFO = pv.Light(position=(0, 0, 10), focal_point=(0, 0, 0), color='white')
UFO.positional = True
UFO.cone_angle = 40
UFO.exponent = 10
UFO.intensity = 3
UFO.show_actor()
plotter.add_light(UFO)

# enable shadows to better demonstrate lighting
plotter.enable_shadows()

plotter.camera_position = [(28, 30, 22), (0.77, 0, -0.44), (0, 0, 1)]
plotter.show()

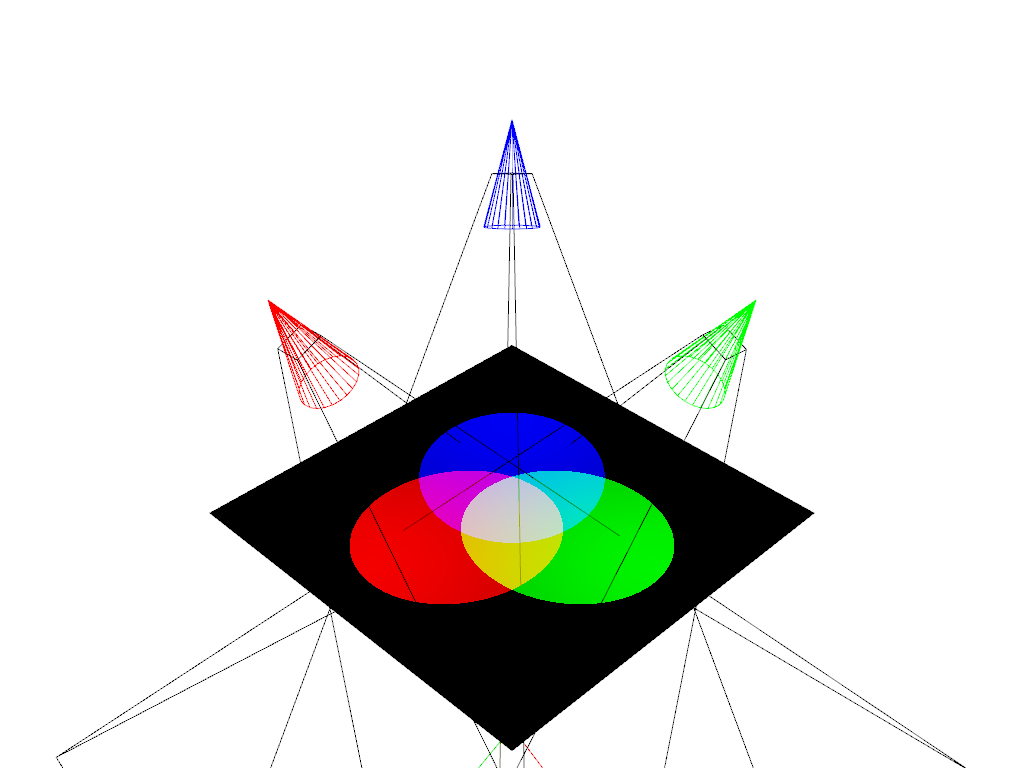
Light actors can be very useful when designing complex scenes where spotlights are involved in lighting.
plotter = pv.Plotter(lighting='none')
plane = pv.Plane(i_size=4, j_size=4)
plotter.add_mesh(plane, color='white')

rot120 = np.array([[-0.5, -np.sqrt(3) / 2, 0], [np.sqrt(3) / 2, -0.5, 0], [0, 0, 1]])

position = (-1.5, -1.5, 3)
focus = (-0.5, -0.5, 0)
colors = ['red', 'lime', 'blue']
for color in colors:
    position = rot120 @ position
    focus = rot120 @ focus
    light = pv.Light(position=position, focal_point=focus, color=color)
    light.positional = True
    light.cone_angle = 15
    light.show_actor()
    plotter.add_light(light)

plotter.show()
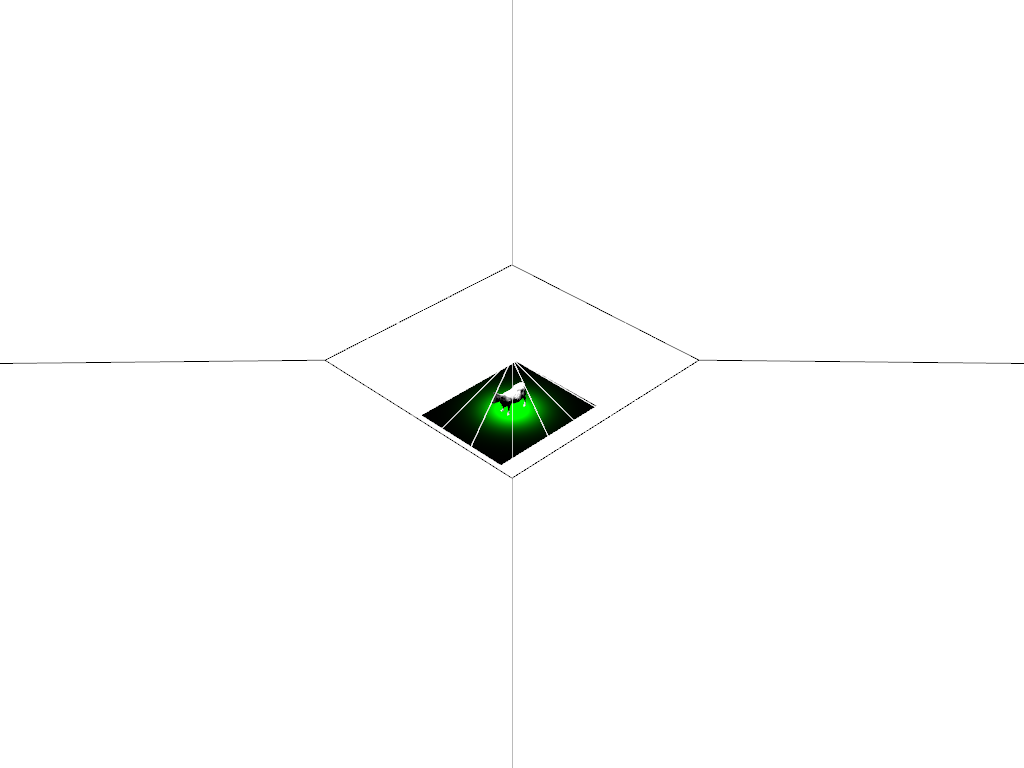
One thing to watch out for is that the light actors are represented such that their cone has a fixed height. This implies that for very large cone angles we typically end up with enormous light actors, in which case setting a manual camera position before rendering is usually a good idea. Increasing the first example’s cone angle and omitting the manual camera positioning exemplifies the problem:
plotter = pv.Plotter(lighting='none')
plotter.add_mesh(cow, color='white')
floor = pv.Plane(center=(*cow.center[:2], cow.bounds[-2]), i_size=30, j_size=25)
plotter.add_mesh(floor, color='green')

UFO = pv.Light(position=(0, 0, 10), focal_point=(0, 0, 0), color='white')
UFO.positional = True
UFO.cone_angle = 89
UFO.exponent = 10
UFO.intensity = 3
UFO.show_actor()
plotter.add_light(UFO)

plotter.show()
Total running time of the script: (0 minutes 1.434 seconds)