pyvista.DataSetFilters.voxelize_binary_mask#
- DataSetFilters.voxelize_binary_mask(
- *,
- background_value: int | float = 0,
- foreground_value: int | float = 1,
- reference_volume: pyvista.ImageData | None = None,
- dimensions: VectorLike[int] | None = None,
- spacing: float | VectorLike[float] | None = None,
- rounding_func: Callable[[VectorLike[float]], VectorLike[int]] | None = None,
- cell_length_percentile: float | None = None,
- cell_length_sample_size: int | None = None,
- progress_bar: bool = False,
Voxelize mesh as a binary
ImageDatamask.The binary mask is a point data array where points inside and outside of the input surface are labelled with
foreground_valueandbackground_value, respectively.This filter implements vtkPolyDataToImageStencil. This algorithm operates as follows:
The algorithm iterates through the z-slice of the
reference_volume.For each slice, it cuts the input
PolyDatasurface to create 2D polylines at that z position. It attempts to close any open polylines.For each x position along the polylines, the corresponding y positions are determined.
For each slice, the grid points are labelled as foreground or background based on their xy coordinates.
The voxelization can be controlled in several ways:
Specify the output geometry using a
reference_volume.Specify the
spacingexplicitly.Specify the
dimensionsexplicitly.Specify the
cell_length_percentile. The spacing is estimated from the surface’s cells using the specified percentile.
Use
reference_volumefor full control of the output mask’s geometry. For all other options, the geometry is implicitly defined such that the generated mask fits the bounds of the input surface.If no inputs are provided,
cell_length_percentile=0.1(10th percentile) is used by default to estimate the spacing. On systems with VTK < 9.2, the default spacing is set to1/100of the input mesh’s length.Added in version 0.45.0.
Note
For best results, ensure the input surface is a closed surface. The surface is considered closed if it has zero
n_open_edges.Note
This filter returns voxels represented as point data, not
VOXELcells. This differs fromvoxelize()andvoxelize_volume()which return meshes with voxel cells. See Image Data Representations for examples demonstrating the difference.Note
This filter does not discard internal surfaces, due, for instance, to intersecting meshes. Instead, the intersection will be considered as background which may produce unexpected results. See Examples.
- Parameters:
- background_value
int, default: 0 Background value of the generated mask.
- foreground_value
int, default: 1 Foreground value of the generated mask.
- reference_volume
pyvista.ImageData,optional Volume to use as a reference. The output will have the same
dimensions,origin,spacing, anddirection_matrixas the reference.- dimensions
VectorLike[int],optional Dimensions of the generated mask image. Set this value to control the dimensions explicitly. If unset, the dimensions are defined implicitly through other parameter. See summary and examples for details.
- spacing
VectorLike[float],optional Approximate spacing to use for the generated mask image. Set this value to control the spacing explicitly. If unset, the spacing is defined implicitly through other parameters. See summary and examples for details.
- rounding_func
Callable[VectorLike[float],VectorLike[int]],optional Control how the dimensions are rounded to integers based on the provided or calculated
spacing. Should accept a length-3 vector containing the dimension values along the three directions and return a length-3 vector.numpy.round()is used by default.Rounding the dimensions implies rounding the actual spacing.
Has no effect if
reference_volumeordimensionsare specified.- cell_length_percentile
float,optional Cell length percentage
pto use for computing the defaultspacing. Default is0.1(10th percentile) and must be between0and1. Thep-th percentile is computed from the cumulative distribution function (CDF) of lengths which are representative of the cell length scales present in the input. The CDF is computed by:Triangulating the input cells.
Sampling a subset of up to
cell_length_sample_sizecells.Computing the distance between two random points in each cell.
Inserting the distance into an ordered set to create the CDF.
Has no effect if
dimensionorreference_volumeare specified.Note
This option is only available for VTK 9.2 or greater.
- cell_length_sample_size
int,optional Number of samples to use for the cumulative distribution function (CDF) when using the
cell_length_percentileoption.100 000samples are used by default.- progress_barbool, default:
False Display a progress bar to indicate progress.
- background_value
- Returns:
pyvista.ImageDataGenerated binary mask with a
'mask'point data array. The data array has dtypenumpy.uint8if the foreground and background values are unsigned and less than 256.
See also
voxelizeSimilar function that returns a
UnstructuredGridofVOXELcells.voxelize_volumeSimilar function that returns a
RectilinearGridwith cell data.pyvista.ImageDataFilters.contour_labelsFilter that generates surface contours from labeled image data. Can be loosely considered as an inverse of this filter.
pyvista.ImageDataFilters.points_to_cellsConvert voxels represented as points to
VOXELcells.pyvista.ImageDataClass used to build custom
reference_volume.
Examples
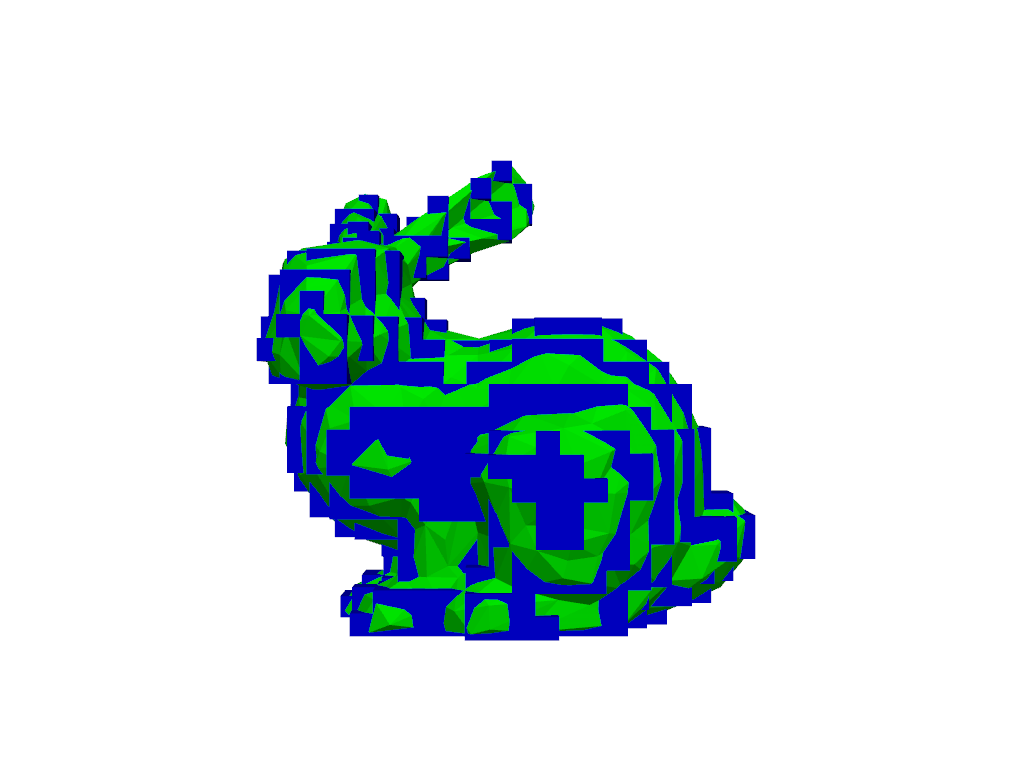
Generate a binary mask from a coarse mesh.
>>> import numpy as np
>>> import pyvista as pv
>>> from pyvista import examples
>>> poly = examples.download_bunny_coarse()
>>> mask = poly.voxelize_binary_mask()
The mask is stored as
ImageDatawith point data scalars (zeros for background, ones for foreground).>>> mask ImageData (...) N Cells: 7056 N Points: 8228 X Bounds: -1.245e-01, 1.731e-01 Y Bounds: -1.135e-01, 1.807e-01 Z Bounds: -1.359e-01, 9.140e-02 Dimensions: 22, 22, 17 Spacing: 1.417e-02, 1.401e-02, 1.421e-02 N Arrays: 1
>>> np.unique(mask.point_data['mask'])
pyvista_ndarray([0, 1], dtype=uint8)
To visualize it as voxel cells, use
points_to_cells(), then usethreshold()to extract the foreground.We also plot the voxel cells in blue and the input poly data in green for comparison.
>>> def mask_and_polydata_plotter(mask, poly):
...     voxel_cells = mask.points_to_cells().threshold(0.5)
...
...     plot = pv.Plotter()
...     _ = plot.add_mesh(voxel_cells, color='blue')
...     _ = plot.add_mesh(poly, color='lime')
...     plot.camera_position = 'xy'
...     return plot
>>> plot = mask_and_polydata_plotter(mask, poly)
>>> plot.show()
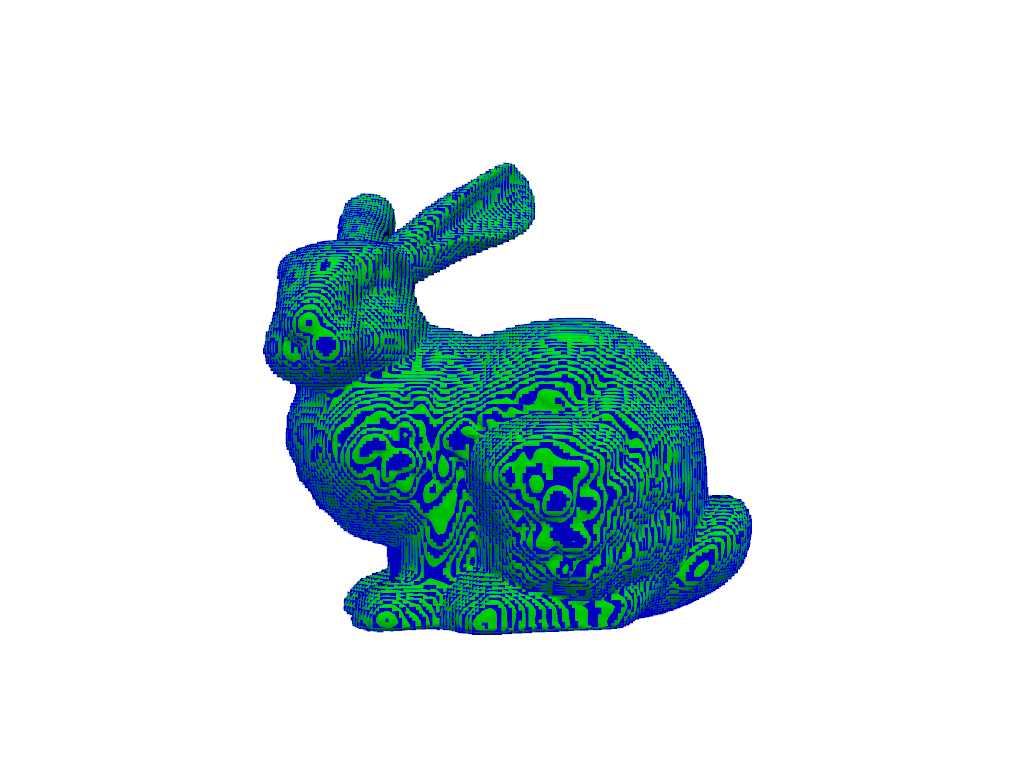
The spacing of the mask image is automatically adjusted to match the density of the input.
Repeat the previous example with a finer mesh.
>>> poly = examples.download_bunny()
>>> mask = poly.voxelize_binary_mask()
>>> plot = mask_and_polydata_plotter(mask, poly)
>>> plot.show()
Control the spacing manually instead. Here, a very coarse spacing is used.
>>> mask = poly.voxelize_binary_mask(spacing=(0.01, 0.04, 0.02))
>>> plot = mask_and_polydata_plotter(mask, poly)
>>> plot.show()
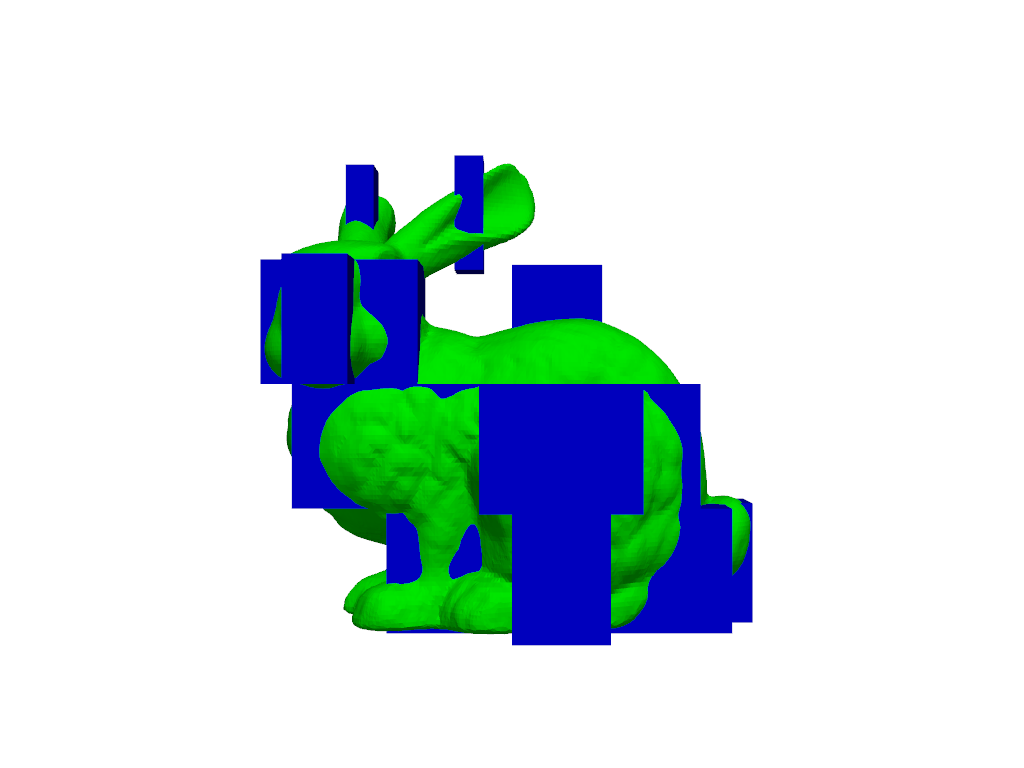
Note that the spacing is only approximate. Check the mask’s actual spacing.
>>> mask.spacing
(0.009731187485158443, 0.03858340159058571, 0.020112216472625732)
The actual values may be greater or less than the specified values. Use
rounding_func=np.floorto force all values to be greater.>>> mask = poly.voxelize_binary_mask( ... spacing=(0.01, 0.04, 0.02), rounding_func=np.floor ... ) >>> mask.spacing (0.01037993331750234, 0.05144453545411428, 0.020112216472625732)
Set the dimensions instead of the spacing.
>>> mask = poly.voxelize_binary_mask(dimensions=(10, 20, 30))
>>> plot = mask_and_polydata_plotter(mask, poly)
>>> plot.show()

>>> mask.dimensions
(10, 20, 30)
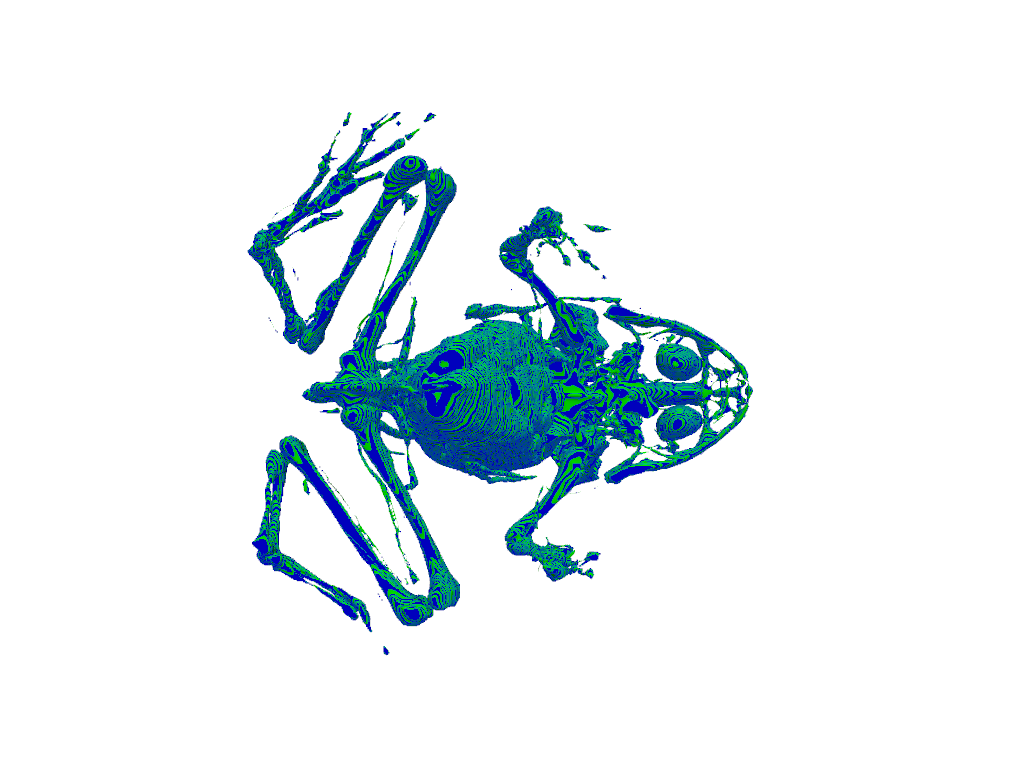
Create a mask using a reference volume. First generate polydata from an existing mask.
>>> volume = examples.load_frog_tissues()
>>> poly = volume.contour_labels()
Now create the mask from the polydata using the volume as a reference.
>>> mask = poly.voxelize_binary_mask(reference_volume=volume)
>>> plot = mask_and_polydata_plotter(mask, poly)
>>> plot.show()
Visualize the effect of internal surfaces.
>>> mesh = pv.Cylinder() + pv.Cylinder((0, 0.75, 0))
>>> binary_mask = mesh.voxelize_binary_mask(
...     dimensions=(1, 100, 50)
... ).points_to_cells()
>>> plot = pv.Plotter()
>>> _ = plot.add_mesh(binary_mask)
>>> _ = plot.add_mesh(mesh.slice(), color='red')
>>> plot.show(cpos='yz')
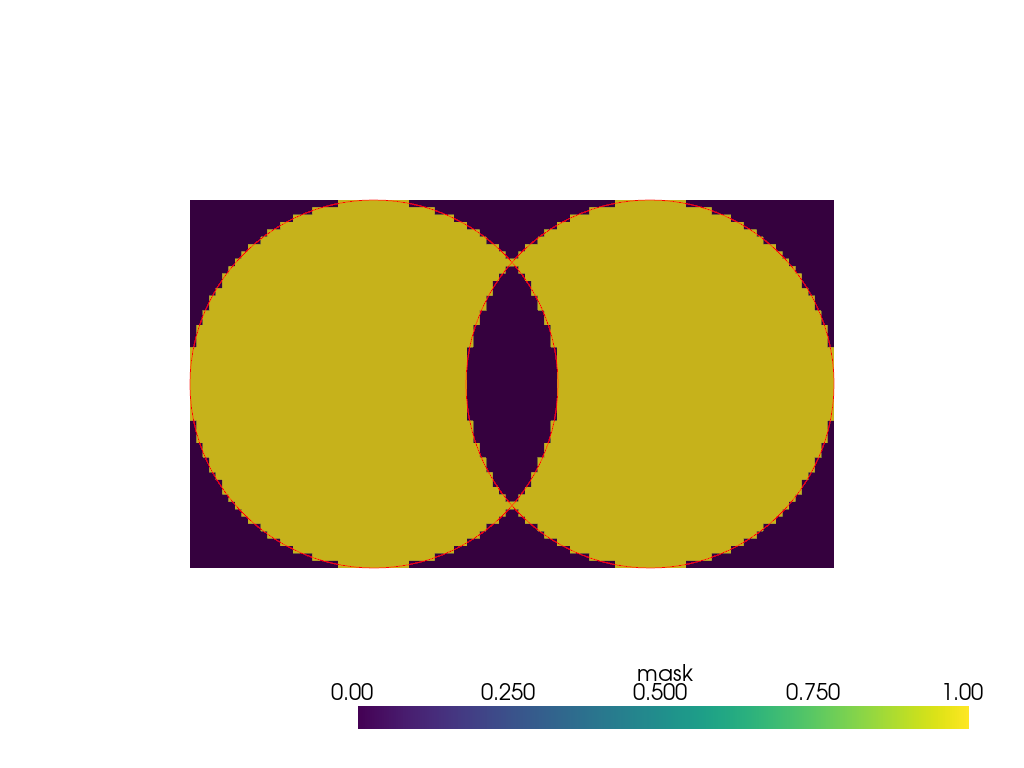
Note how the intersection is excluded from the mask. To include the voxels delimited by internal surfaces in the foreground, the internal surfaces should be removed, for instance by applying a boolean union. Note that this operation in unreliable in VTK but may be performed with external tools such as vtkbool.
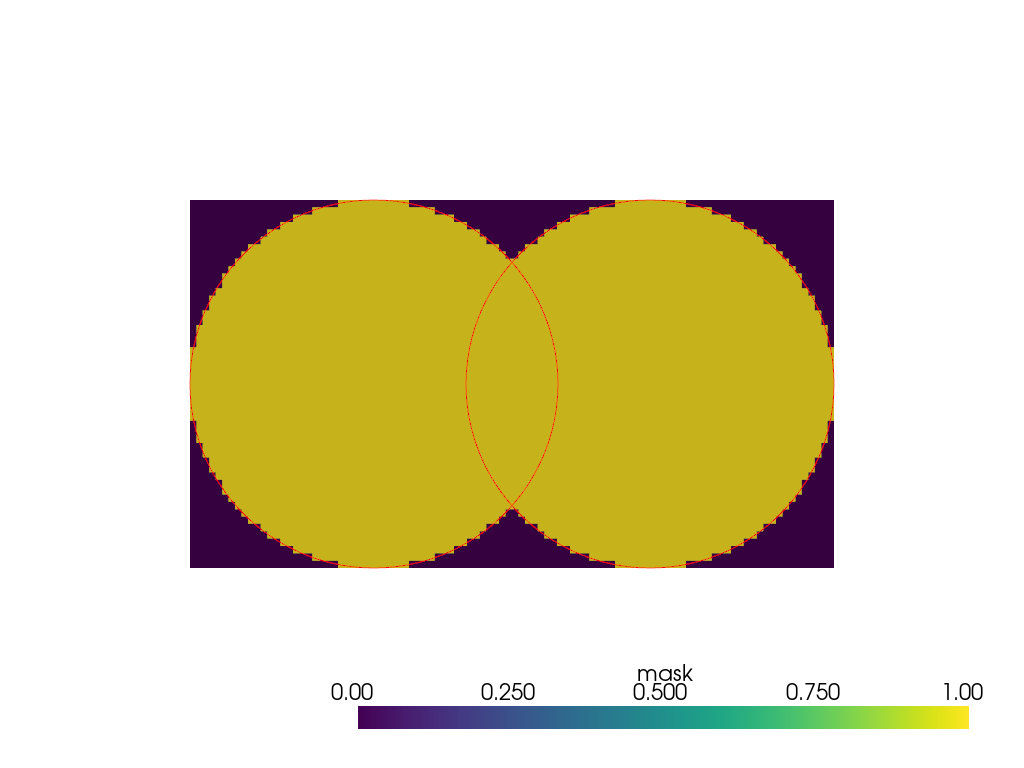
Alternatively, the intersecting parts of the mesh can be processed sequentially.
>>> cylinder_1 = pv.Cylinder()
>>> cylinder_2 = pv.Cylinder((0, 0.75, 0))
>>> reference_volume = pv.ImageData(
...     dimensions=(1, 100, 50),
...     spacing=(1, 0.0175, 0.02),
...     origin=(0, -0.5 + 0.0175 / 2, -0.5 + 0.02 / 2),
... )
>>> binary_mask_1 = cylinder_1.voxelize_binary_mask(
...     reference_volume=reference_volume
... ).points_to_cells()
>>> binary_mask_2 = cylinder_2.voxelize_binary_mask(
...     reference_volume=reference_volume
... ).points_to_cells()
>>> binary_mask_1['mask'] = binary_mask_1['mask'] | binary_mask_2['mask']
>>> plot = pv.Plotter()
>>> _ = plot.add_mesh(binary_mask_1)
>>> _ = plot.add_mesh(cylinder_1.slice(), color='red')
>>> _ = plot.add_mesh(cylinder_2.slice(), color='red')
>>> plot.show(cpos='yz')
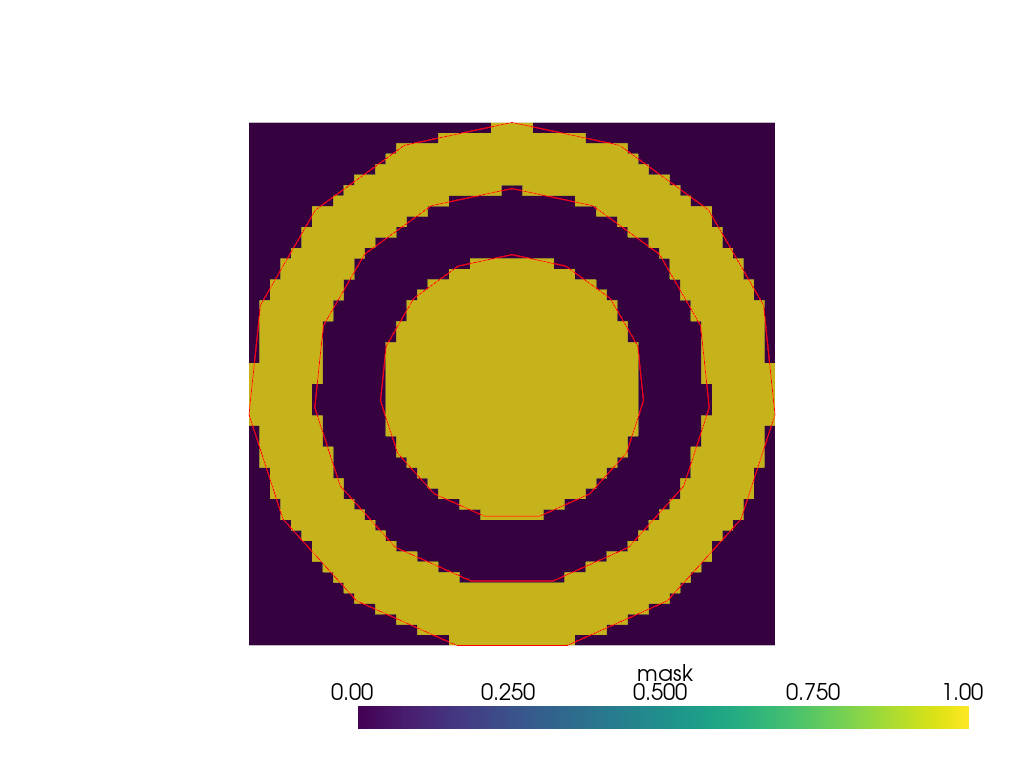
When multiple internal surfaces are nested, they are successively treated as interfaces between background and foreground.
>>> mesh = pv.Tube(radius=2) + pv.Tube(radius=3) + pv.Tube(radius=4)
>>> binary_mask = mesh.voxelize_binary_mask(
...     dimensions=(1, 50, 50)
... ).points_to_cells()
>>> plot = pv.Plotter()
>>> _ = plot.add_mesh(binary_mask)
>>> _ = plot.add_mesh(mesh.slice(), color='red')
>>> plot.show(cpos='yz')