注釈
Go to the end をクリックすると完全なサンプルコードをダウンロードできます.
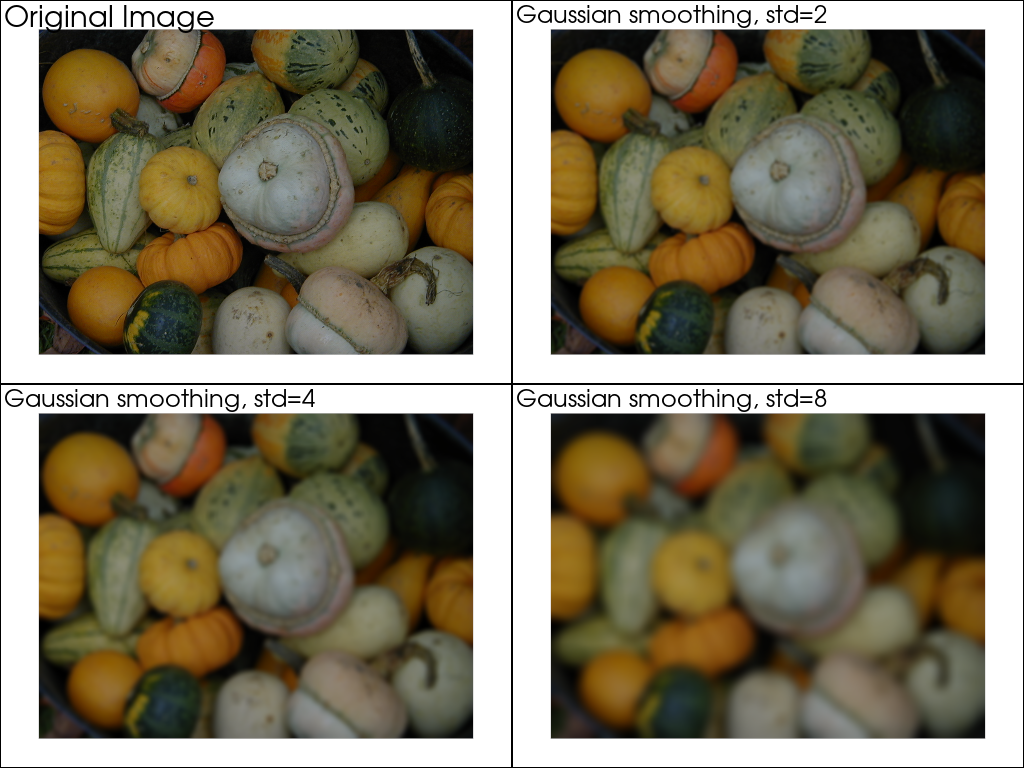
Gaussianスムージング#
均一グリッドデータセットでGauss畳み込みを実行します.
pyvista.ImageData データ集合(a.k.a. イメージ) aは,画像データ集合を1次元から3次元入力に対してガウス関数で畳み込むことによって平滑化することができる.これは,一般にガウスぼかしと呼ばれ,通常,ノイズを低減するか,または画像データセットの詳細を低減するために使用される.
pyvista.ImageDataFilters.gaussian_smooth() も参照してください.
from __future__ import annotations

import pyvista as pv
from pyvista import examples

# Load dataset
data = examples.download_gourds()

# Define a good point of view
cp = pv.CameraPosition(
    position=(319.5, 239.5, 1053.7372980874645),
    focal_point=(319.5, 239.5, 0.0),
    viewup=(0.0, 1.0, 0.0),
)
異なる値の標準偏差でGaussスムージングを適用します.
pl = pv.Plotter(shape=(2, 2))

pl.subplot(0, 0)
pl.add_text('Original Image', font_size=14)
pl.add_mesh(data, rgb=True)
pl.camera_position = cp

pl.subplot(0, 1)
pl.add_text('Gaussian smoothing, std=2', font_size=14)
pl.add_mesh(data.gaussian_smooth(std_dev=2.0), rgb=True)
pl.camera_position = cp

pl.subplot(1, 0)
pl.add_text('Gaussian smoothing, std=4', font_size=14)
pl.add_mesh(data.gaussian_smooth(std_dev=4.0), rgb=True)
pl.camera_position = cp

pl.subplot(1, 1)
pl.add_text('Gaussian smoothing, std=8', font_size=14)
pl.add_mesh(data.gaussian_smooth(std_dev=8.0), rgb=True)
pl.camera_position = cp

pl.show()
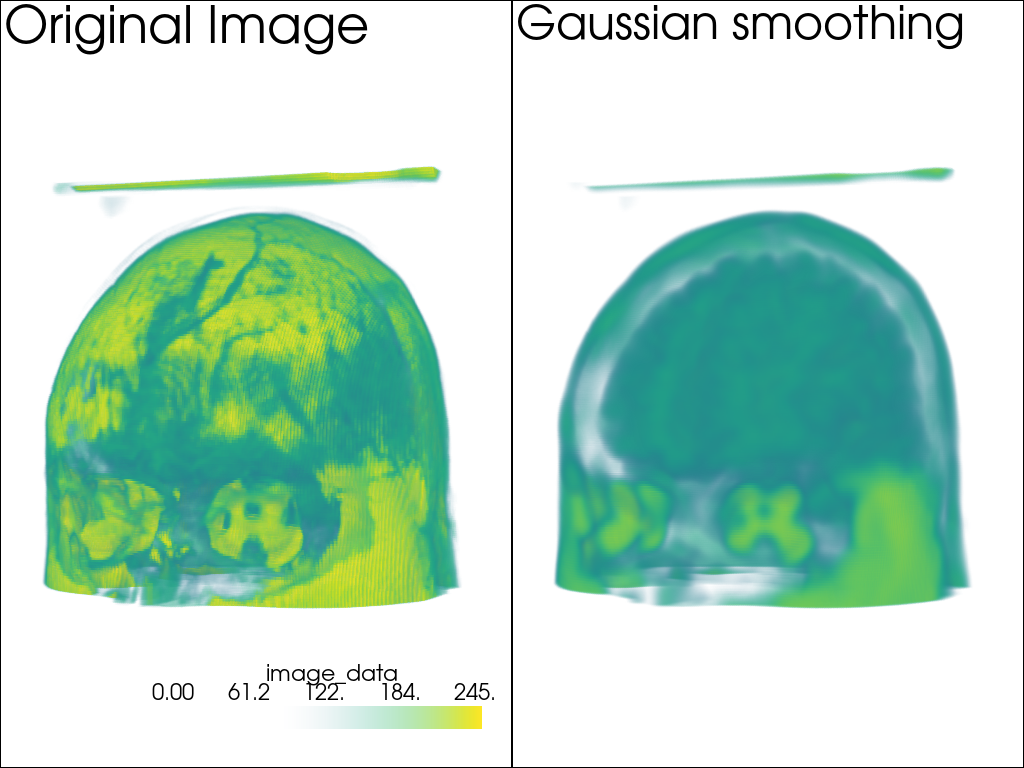
ボリュームレンダリング#
次に,ボリュームレンダリングを使用した3Dデータセットの例を見てみましょう:
data = examples.download_brain()

smoothed_data = data.gaussian_smooth(std_dev=3.0)


dargs = dict(clim=smoothed_data.get_data_range(), opacity=[0, 0, 0, 0.1, 0.3, 0.6, 1])

n = [100, 150, 200, 245, 255]

pl = pv.Plotter(shape=(1, 2))
pl.subplot(0, 0)
pl.add_text('Original Image', font_size=24)
# pl.add_mesh(data.contour(n), **dargs)
pl.add_volume(data, **dargs)
pl.subplot(0, 1)
pl.add_text('Gaussian smoothing', font_size=24)
# pl.add_mesh(smoothed_data.contour(n), **dargs)
pl.add_volume(smoothed_data, **dargs)
pl.link_views()
pl.camera_position = pv.CameraPosition(
    position=(-162.0, 704.8, 65.02),
    focal_point=(90.0, 108.0, 90.0),
    viewup=(0.0068, 0.0447, 0.999),
)
pl.show()
Total running time of the script: (0 minutes 9.207 seconds)